
Configuring a Salesforce Calendar Without Writing Code
100+ properties sounds like a project. It is a wizard, three questions, and a live preview that shows you the calendar before you save anything.
Most Salesforce components with real depth make you learn them twice: once to understand the properties, once to remember which combination you picked last time. The Setup Wizard exists so you do neither. It asks what you are scheduling, writes the configuration as metadata, and hands you a name you can use anywhere.
Two ways in, plus two shortcuts
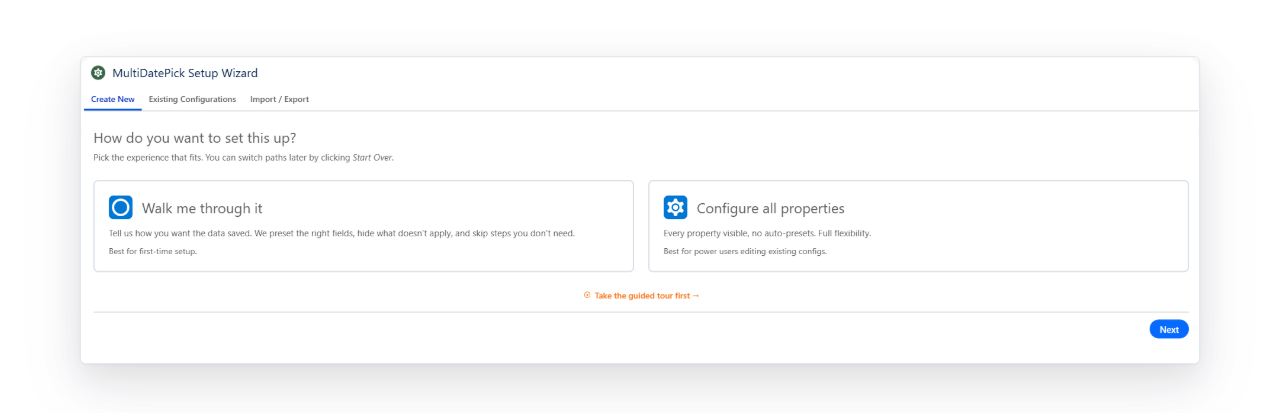
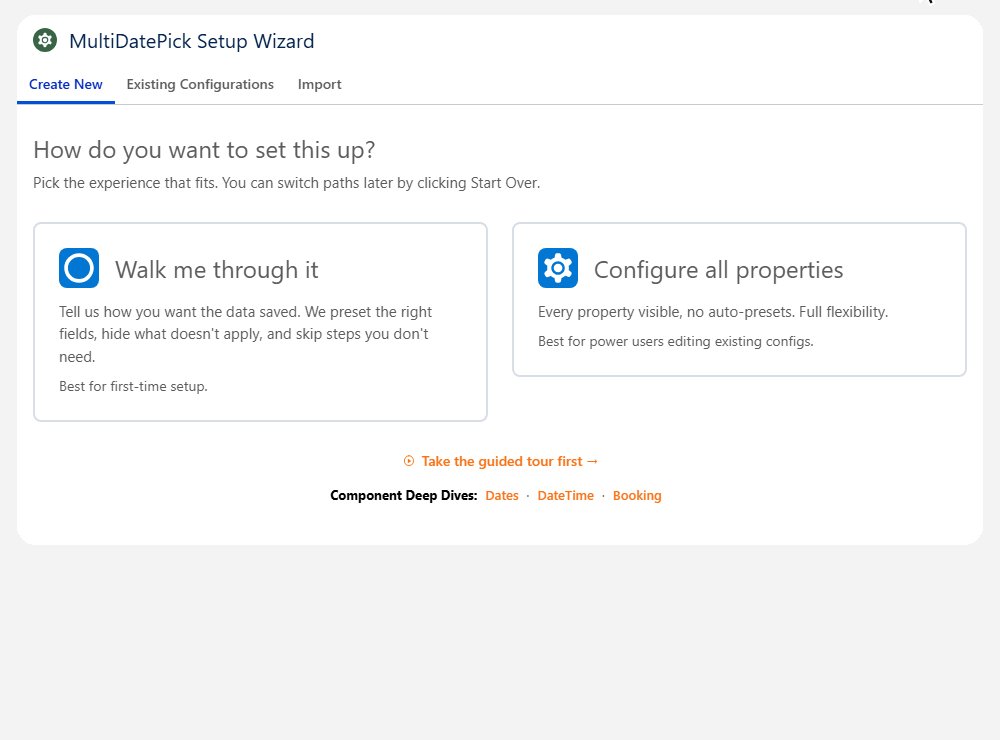
The Create New tab opens on two paths. Two more tabs sit beside it for configs you already have.
Walk me through it
Three questions about what you are scheduling. Best for first-time setup.
Configure all properties
Every property visible, with a live preview. Best when you know exactly what you want.
Existing Configurations
Your saved configs with their component type. Open one to edit or clone it.
Import
Paste a config from the Config Library or another org.
Five steps, start to finish
| Step | What you set |
|---|---|
| 1. Name & Type | The config name and which component it is for: Dates, Dates & Times or Resource Booking. |
| 2. Object & Fields | The object that holds the records, the date field, the parent lookup, and the resource if you book one. |
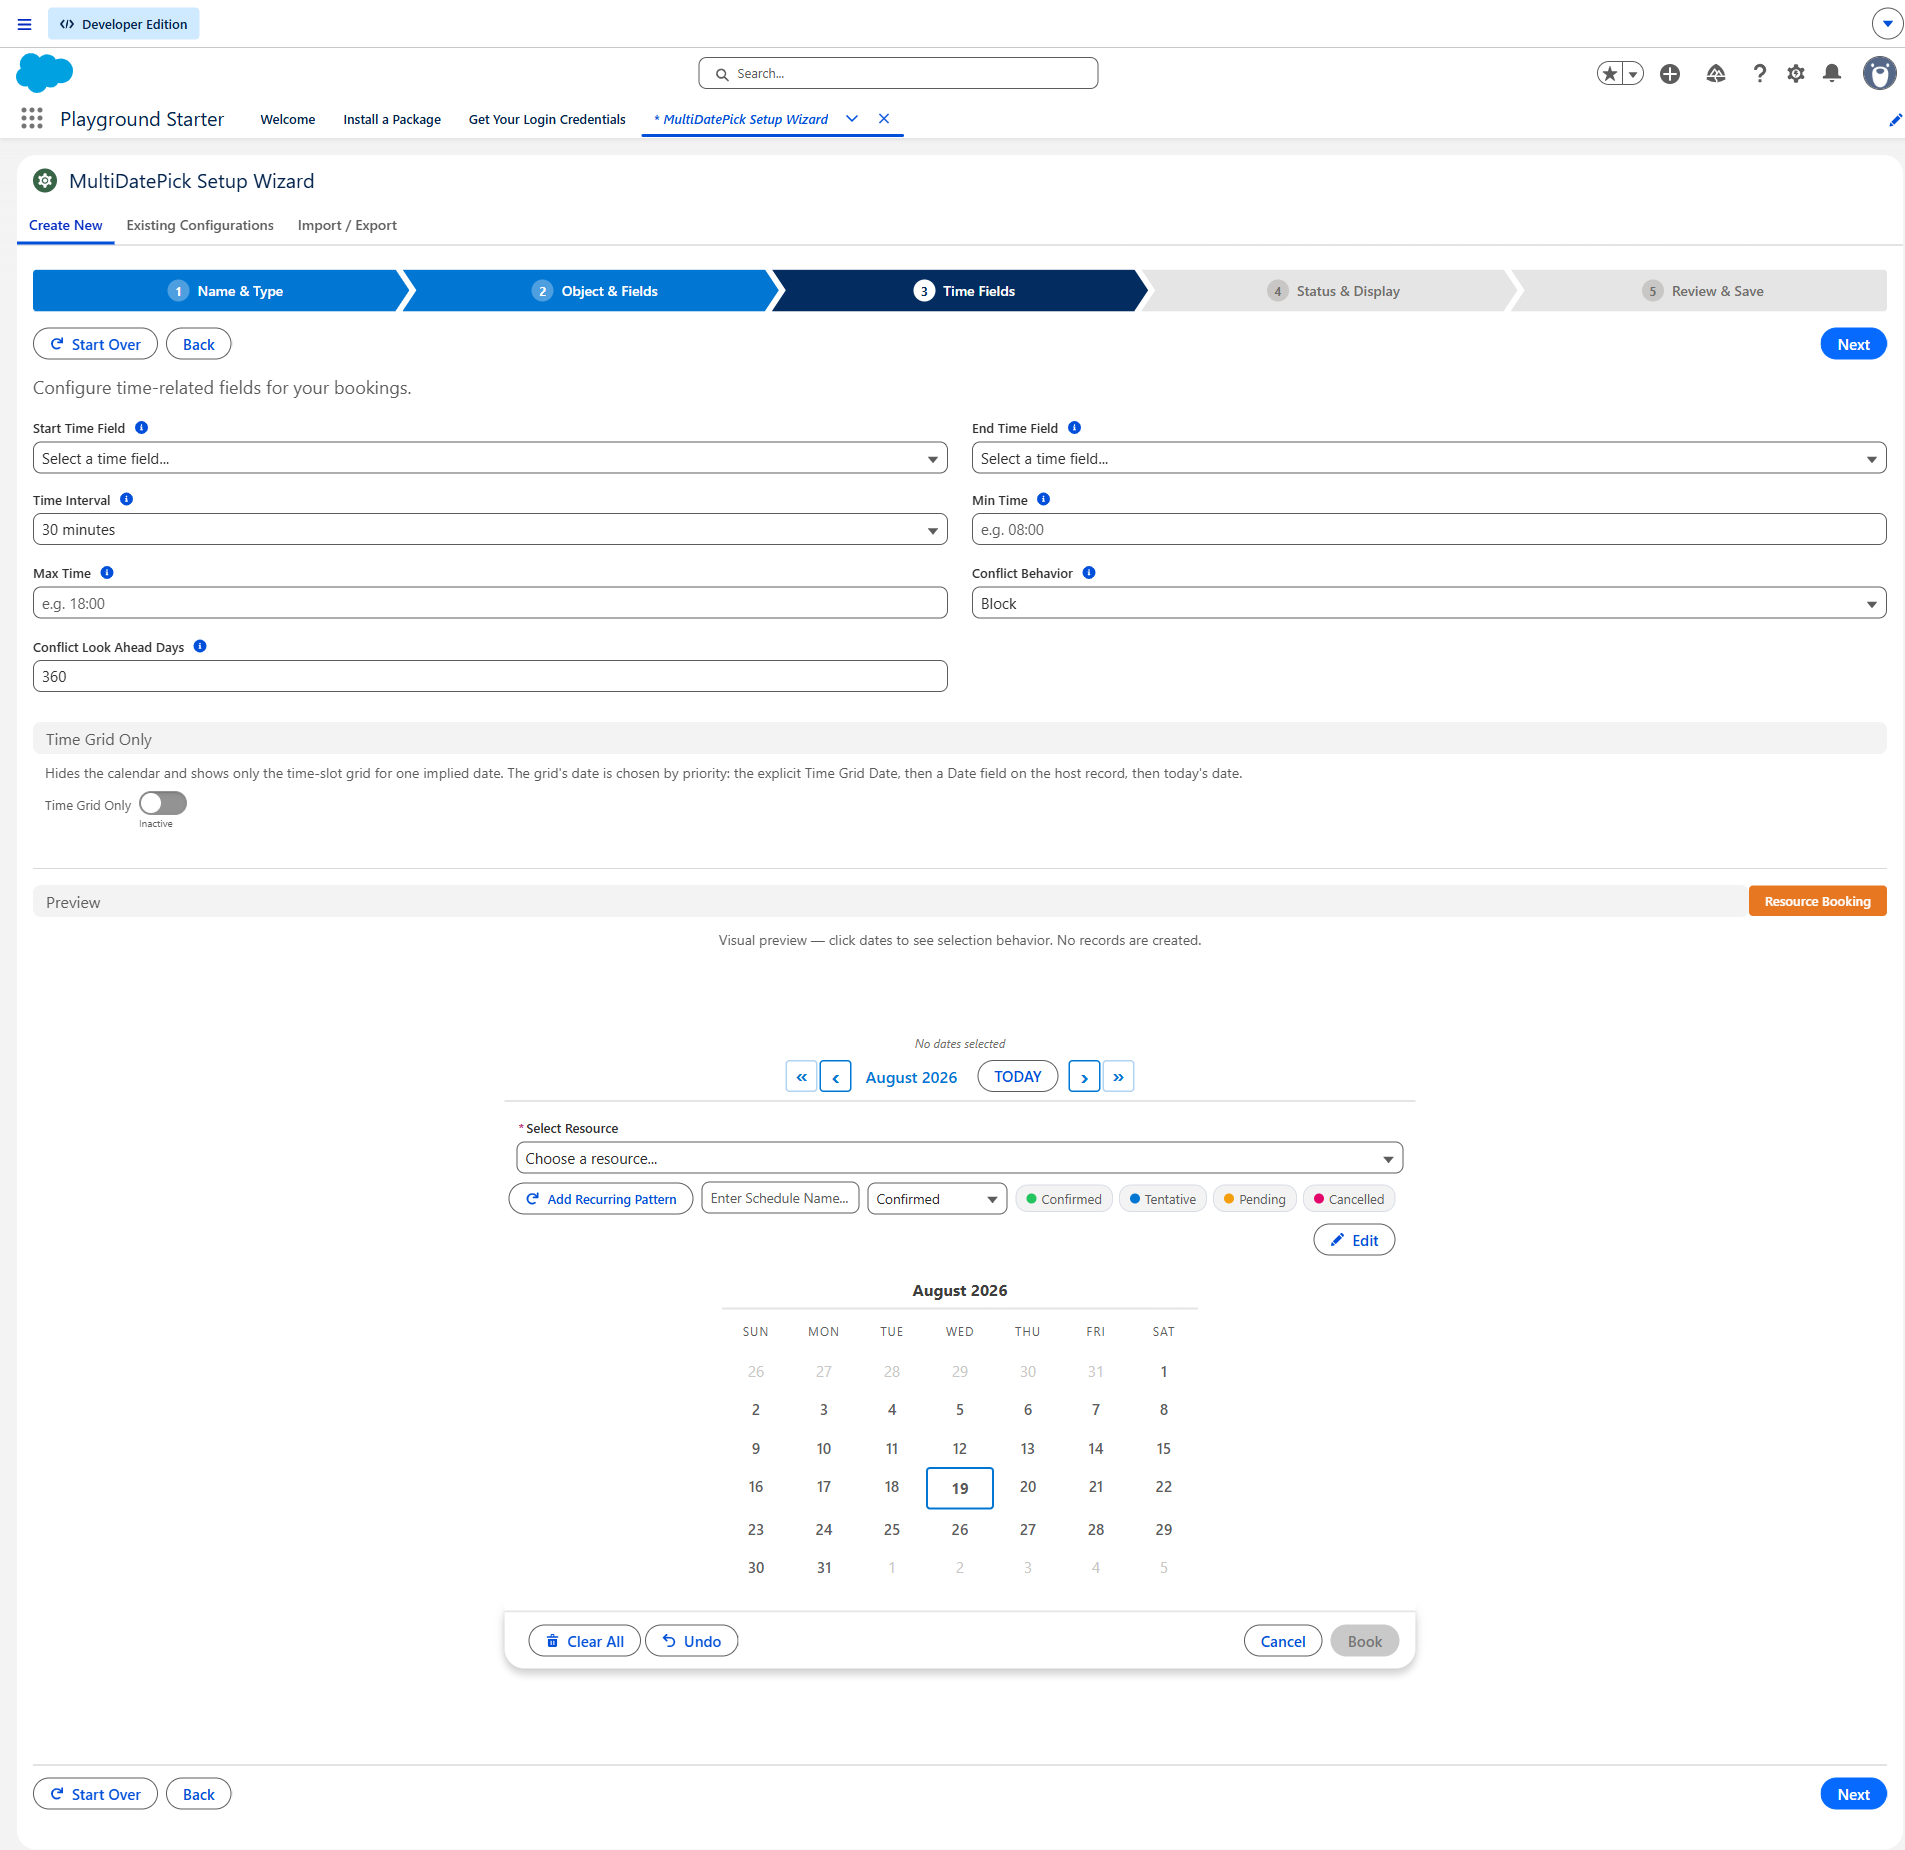
| 3. Time Fields | Start and end time, slot interval and business hours, for configs that capture times. |
| 4. Status & Display | Status colors, hover fields and edit mode. |
| 5. Review & Save | A summary of every choice, then save. |
The three questions that decide everything
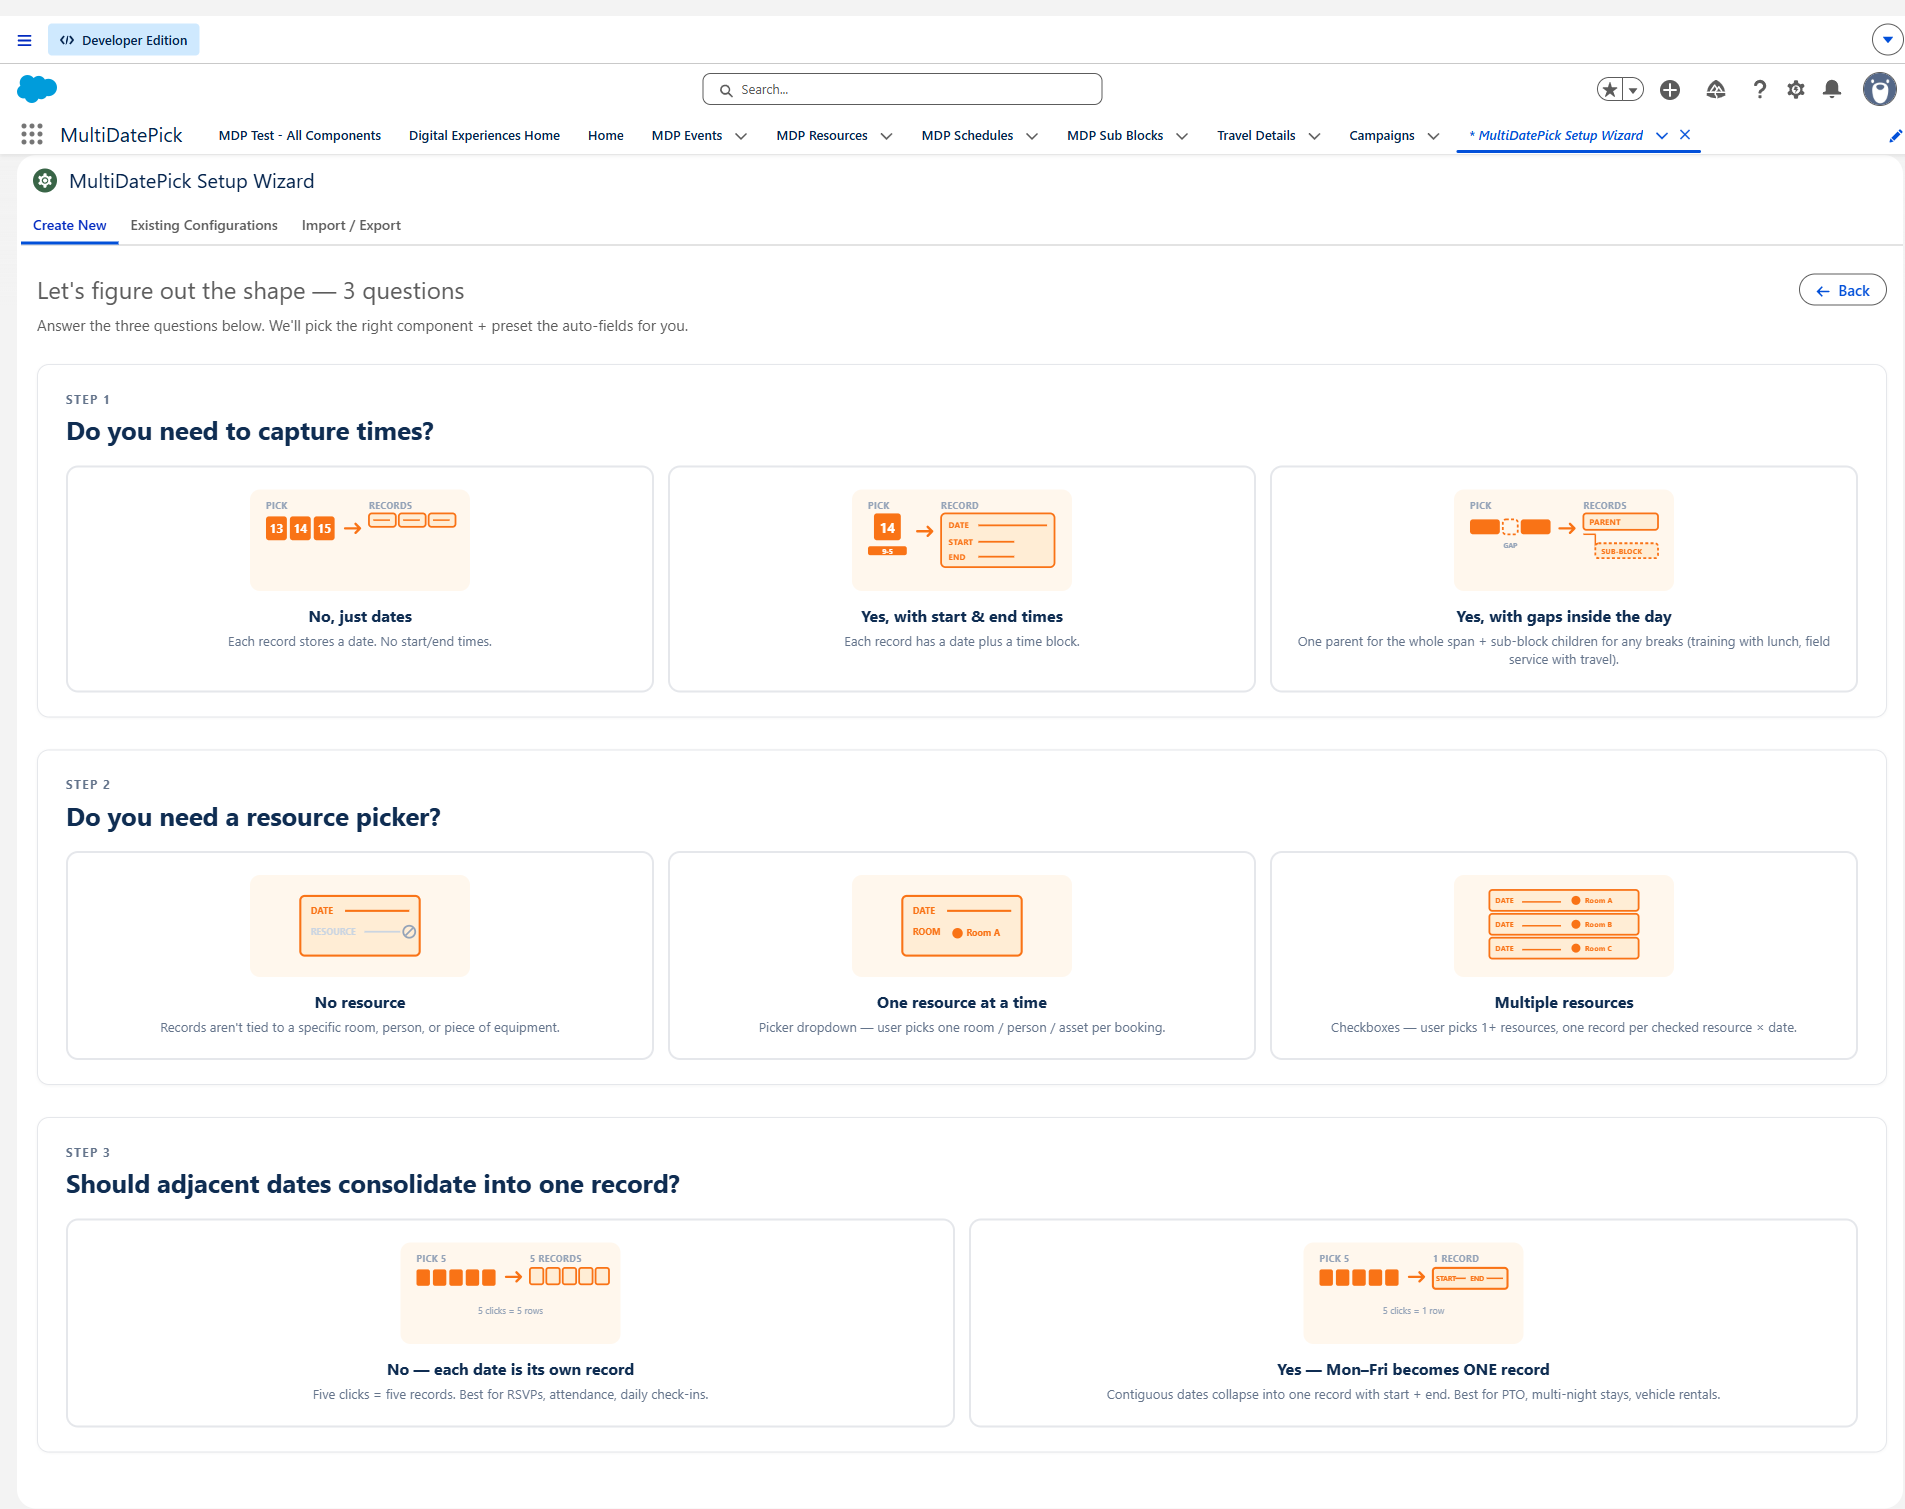
The guided path asks about the shape of the records you want, rather than about properties. Every answer combination is valid, and together they decide what the component writes:
- Do you need times, or just dates? Dates alone, a time on each date, or a parent block with sub-blocks for the gaps inside it.
- Are you booking a resource? None, one at a time, or several at once.
- Should consecutive dates collapse into a range? One record per date, or one record with a start and an end.
The answers are independent, so they describe the whole grid of possibilities rather than a menu of presets. Monday through Friday for six weeks can be thirty records or six. You choose that here, on purpose, before any data exists.
A live preview, before anything is saved
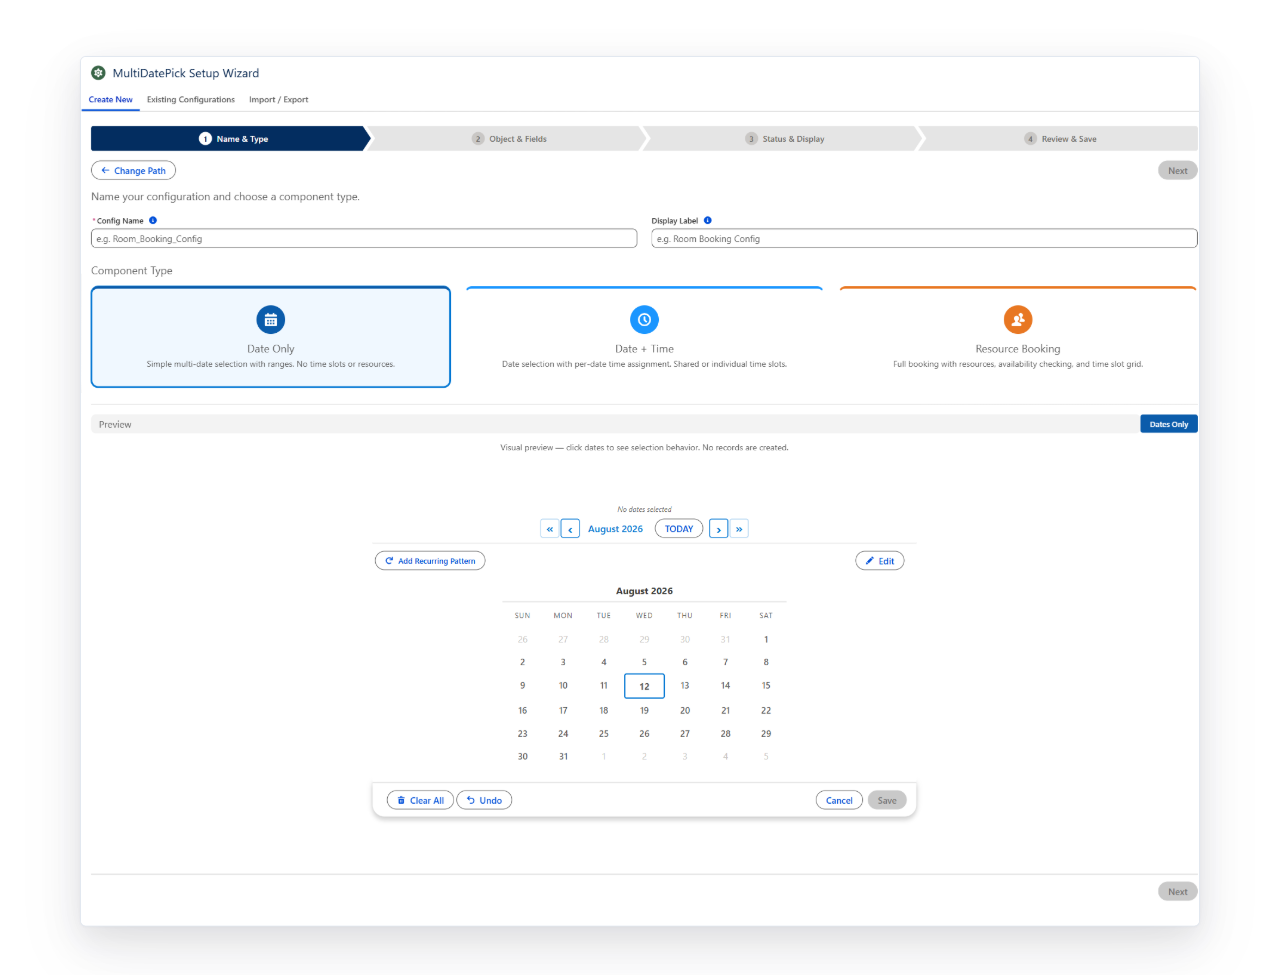
The preview pane renders a working calendar underneath the form as you change properties. Turn on two-month view and it appears. Add status colors and the cells fill. It is the actual component, so what you approve is what you deploy.
The expensive mistakes in scheduling configuration are shape decisions you cannot see until real records exist. Seeing the calendar respond while you are still deciding removes most of that risk.
Inside the steps: Object & Fields, Time Fields, Status & Display
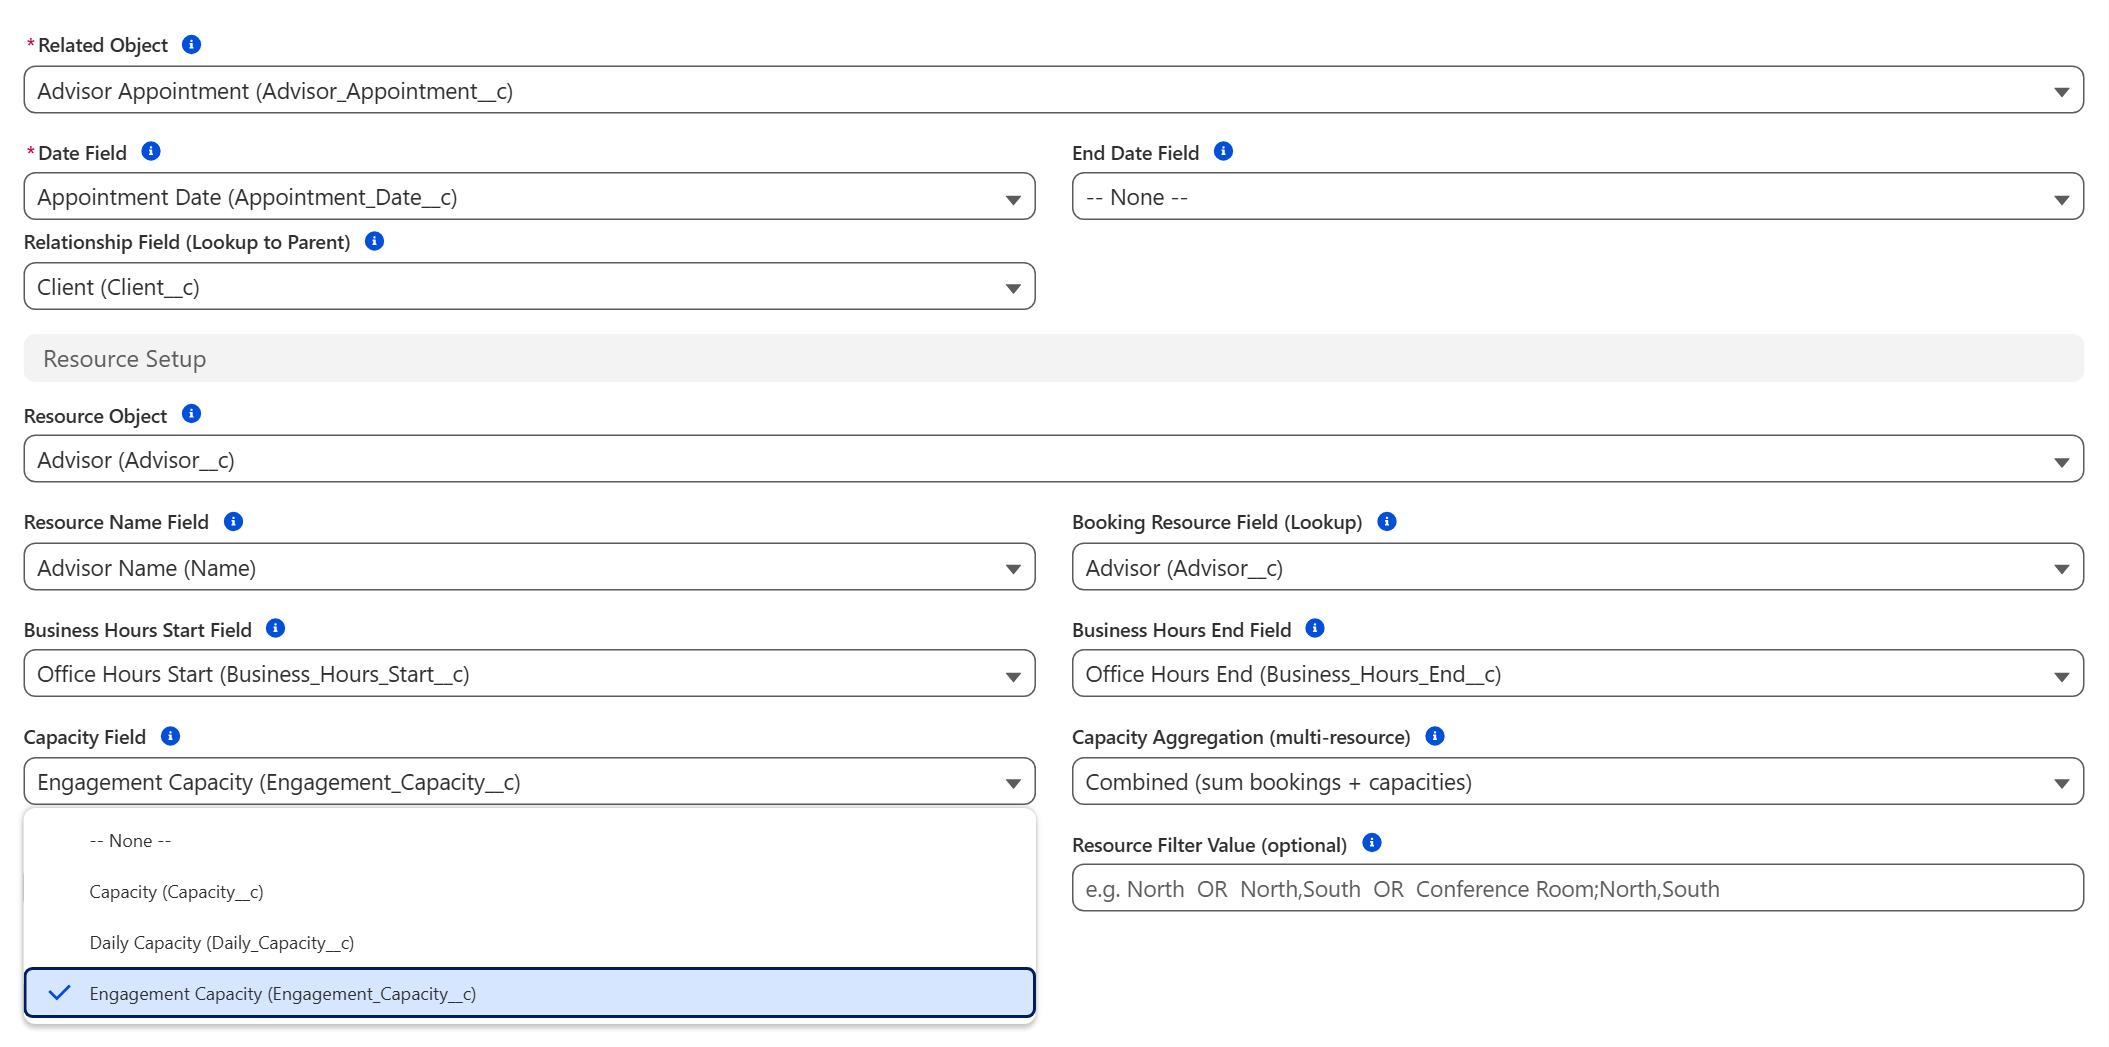
Two steps do most of the heavy lifting on a booking or scheduling config. Time Fields maps the start time, end time and interval your calendar needs. Status & Display is where the visual polish lives, from status-driven cell colors to which fields show on hover.
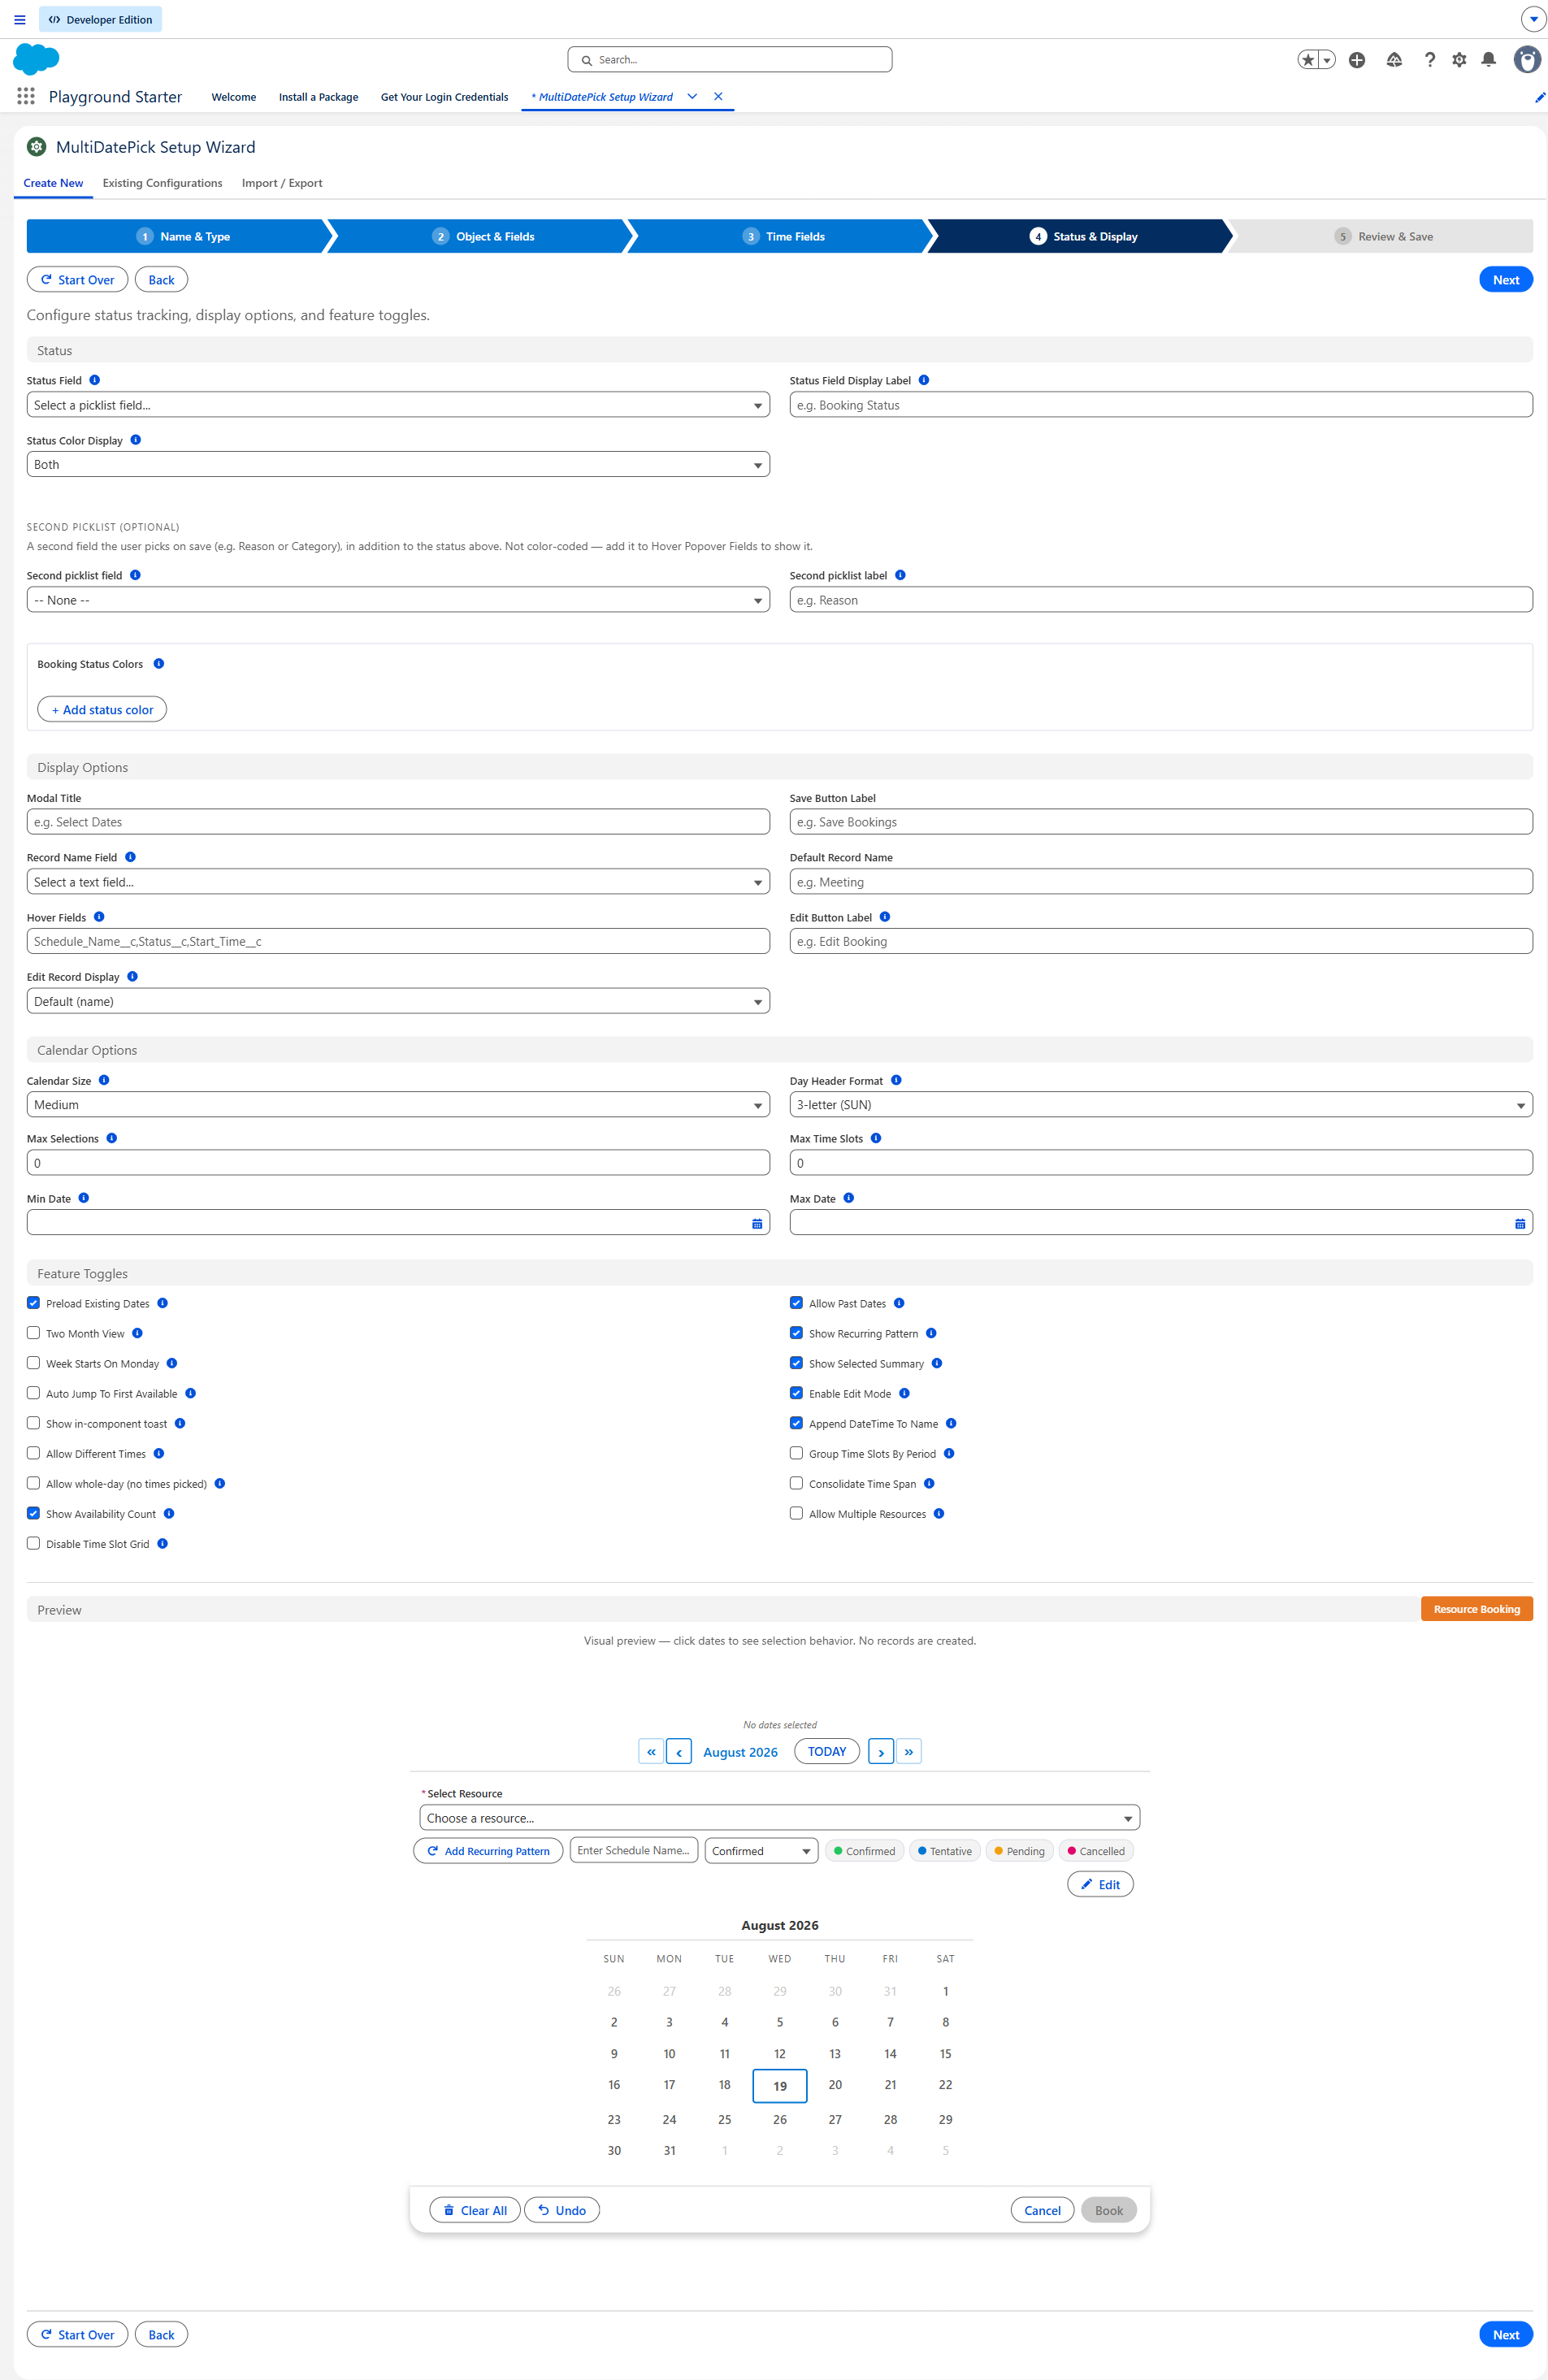
On Status & Display, pick a status field, map a color to each value, and choose whether the color paints the calendar cell, the time slot grid, or both. Add hover fields so pointing at a booking previews the details.
What it actually writes
Saving deploys a Custom Metadata record. Three things follow:
- It is deployable. Custom Metadata moves through your normal release pipeline, sandbox to production, like any other component.
- It is reusable. Put the name in Config Name on any component and it picks up the whole configuration. One config, many placements.
- It stays in your org. Nothing is stored on a vendor server, so the configuration is yours and it is visible in Setup.
Import, export, and the mapping step people miss
The Import tab takes a JSON configuration and turns it into a saved config. That is how the Config Library works: 40+ ready-made configurations covering time-off requests, room booking, hot-desking, interview scheduling, fleet reservation and more.
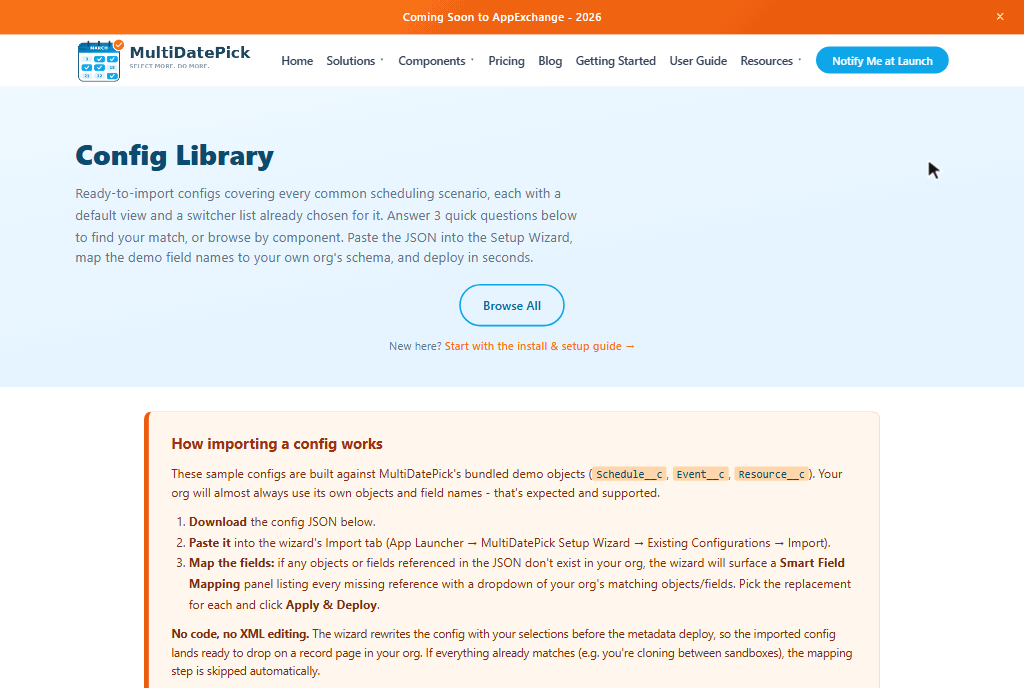
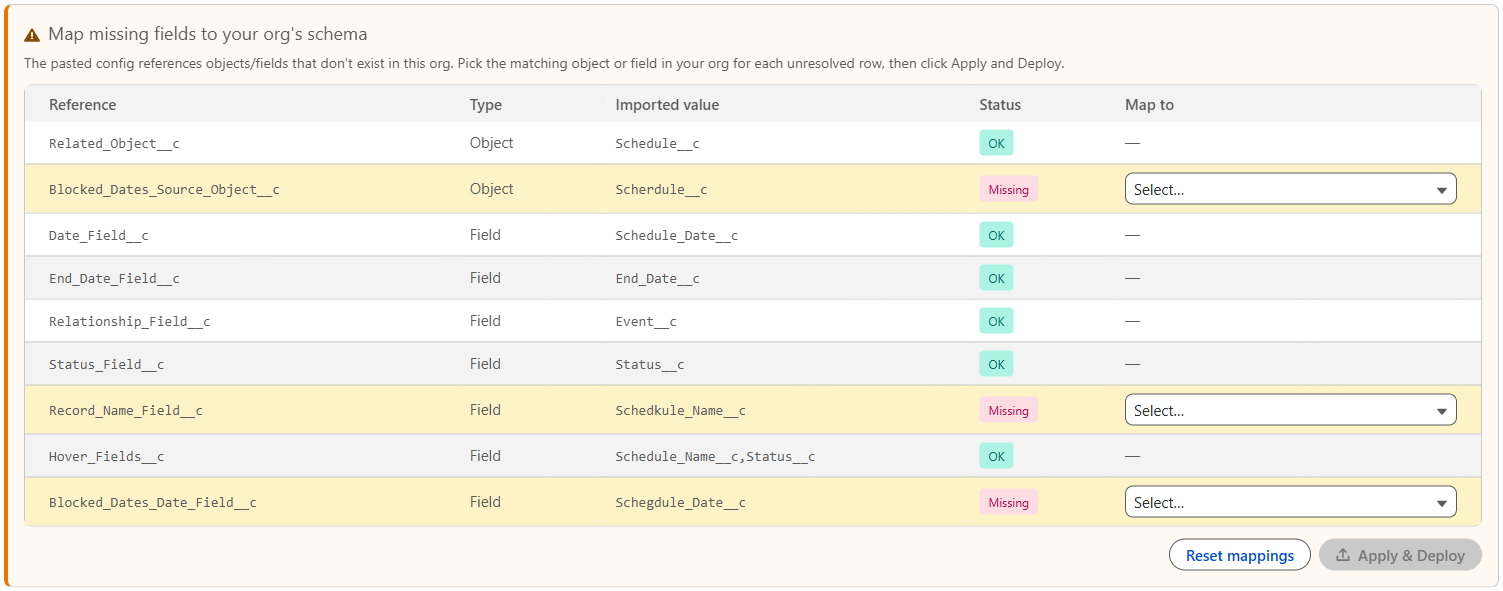
The step that saves the most time is Smart Field Mapping. Library configs reference the demo objects; your org has its own. The wizard scans every reference the moment you paste, flags each one your org does not have, and puts a dropdown next to it sourced live from the object's real field list. Remap in the wizard, click Apply, and it deploys with the rewritten JSON. No text editor, no hunt and replace, no re-uploads.
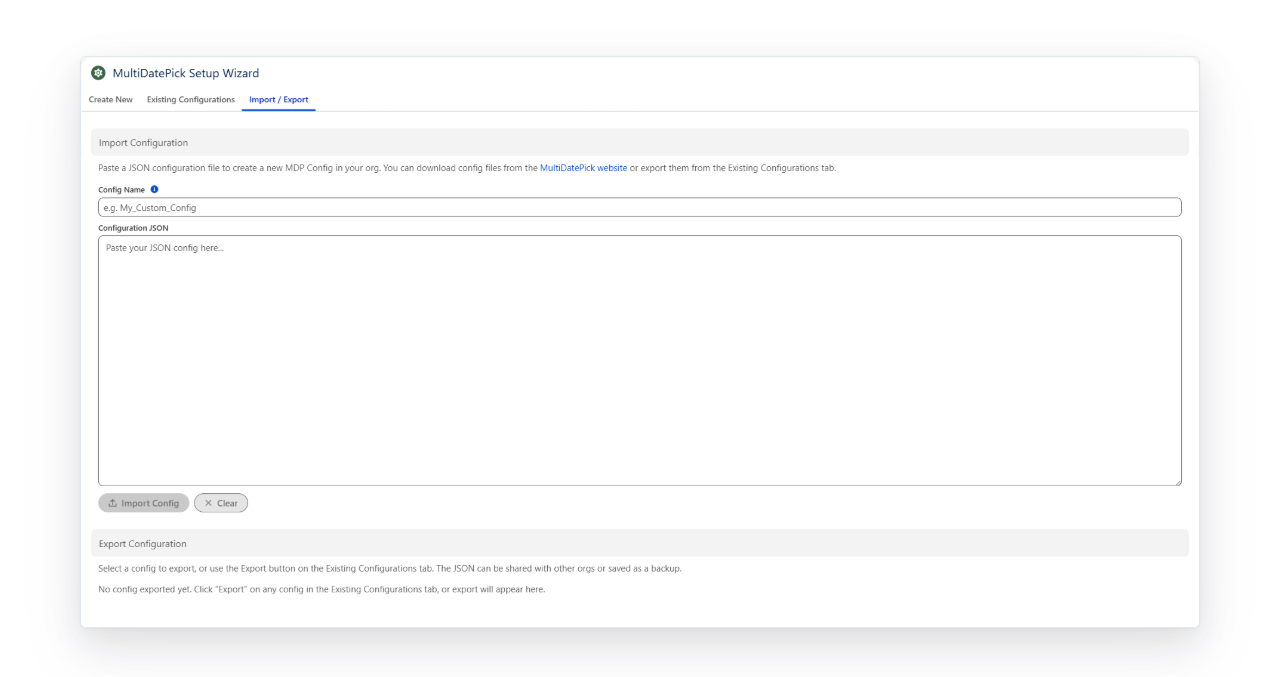
Export works the same way in reverse, which makes configurations shareable. A config that works in one org is a paste away from working in another.
Using the config once it exists
Drop any of the three components onto a Lightning record page, app page, Home page or Experience Cloud site, set Config Name to the name you chose, and leave every other property blank. The config supplies them. On App, Home and Experience pages, put the parent record in Static Parent Record Id.
The same applies inside a Screen Flow: put the config's name in Config Name and every on/off setting comes from the config. You do not set a single checkbox in Flow Builder; the few flow-only ones (Required, Show Inline, Output Date Ranges as JSON) are off unless you turn them on. Pass the parent record into Parent Record Id.
From a blank org to a working calendar, in clicks
Try the components in the live demo, then follow Getting Started to run the wizard in your own org.
- $20/user/month, every feature
- 30-day free trial, no card
- 100% native Salesforce
- No Apex
- Coming soon to the Salesforce AppExchange